Friday, 11 September 2015

Duck Duck Goose: A finish

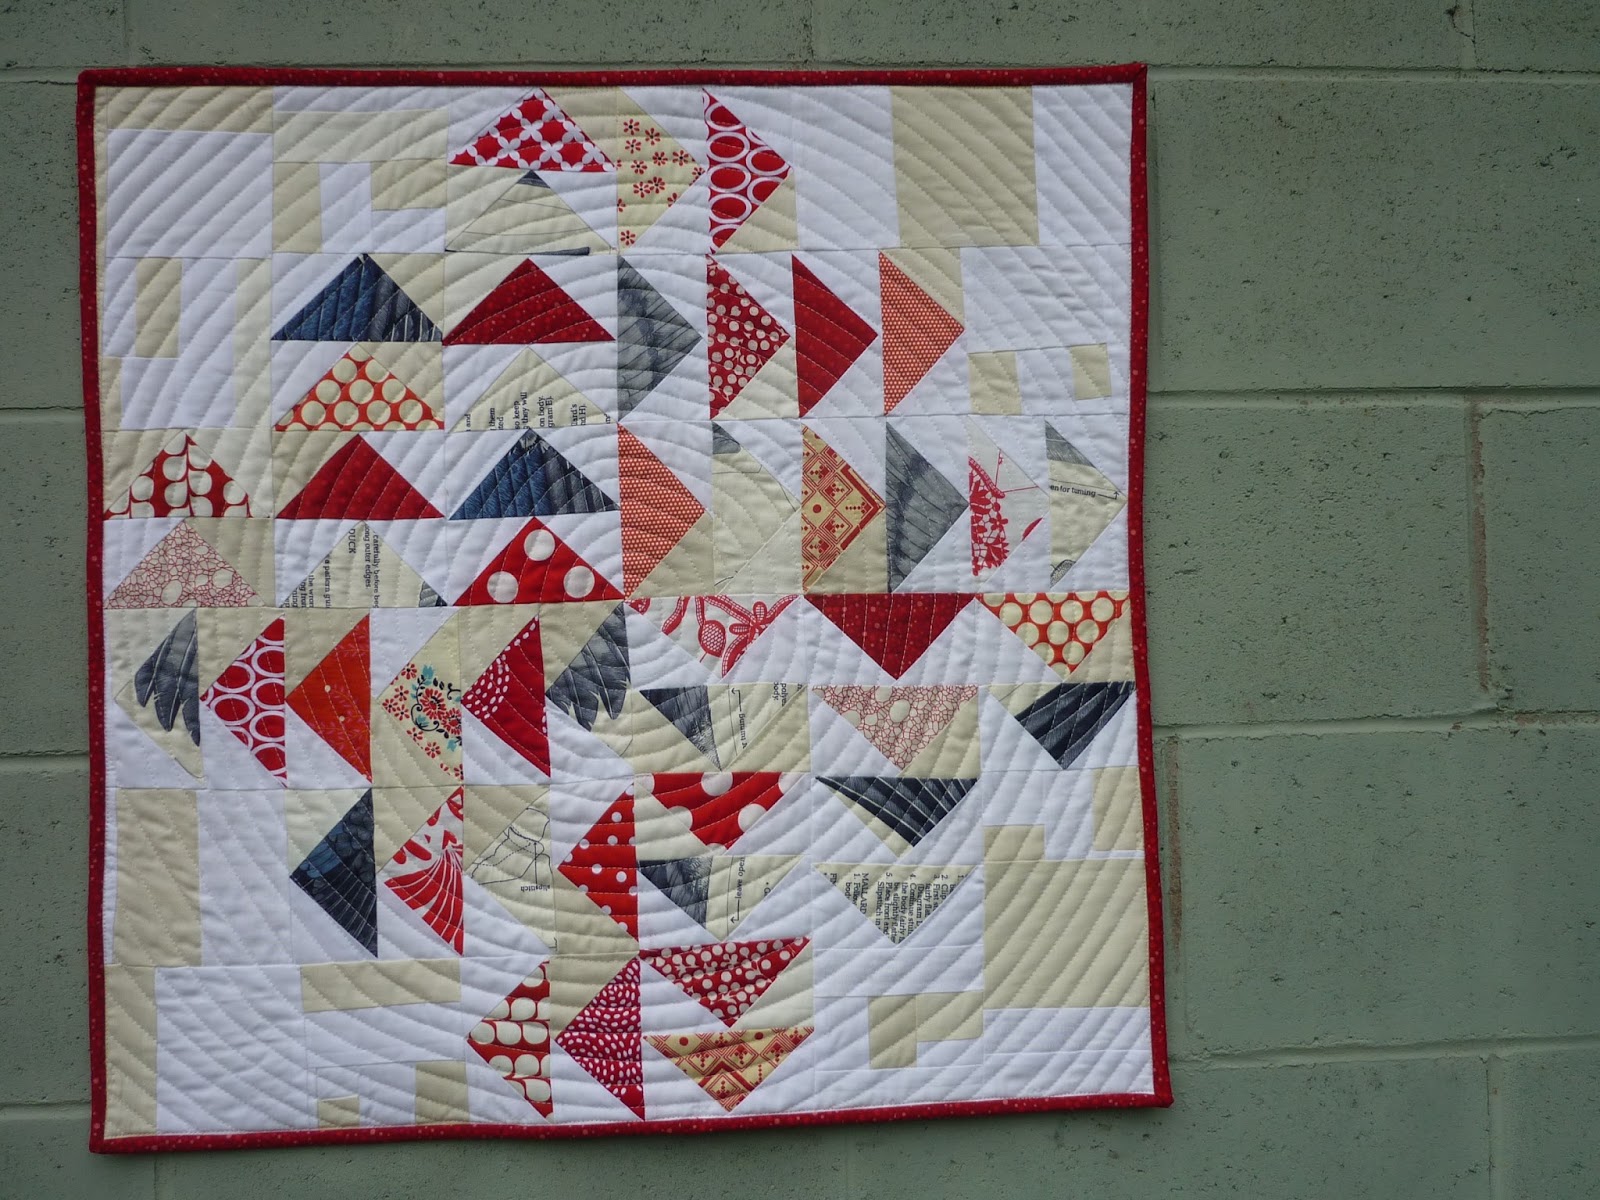
This is a very special finish, and one that I have been dying to share! Last night at the MMQG September meeting some of our members swapped mini quilts. This was the quilt I made for a very special Quilty friend Dena.


This was not a blind swap, we each filled out a questionnaire so that our partner would know what we liked. Dena liked red and white and paper piecing, so I started there. But then I had another influence. This


This is the 3-D Duck panel that I rescued at our July De-Stash Yardsale and declared that I could make something modern out if it. Hey, I was high on fabric sales. Anywho, I though ducks, geese, flying geese and there you have it. I knew I would use the panel like yardage and just cut it up for piecing. It had great text on it with the instructions and the color and texture of the wings was pretty cool.


I started making my red and "duck" flying geese based on a this design by Fancy Tiger Crafts. It was fun to shrink the pattern to the mini size requirements (circumference no more than 100") and work with the duck fabric and all of my red stash.


I made the background with multiple white-cream solids to give the top some texture, quilting in a spiral circle, and bound with more red. I LOVE IT!!!


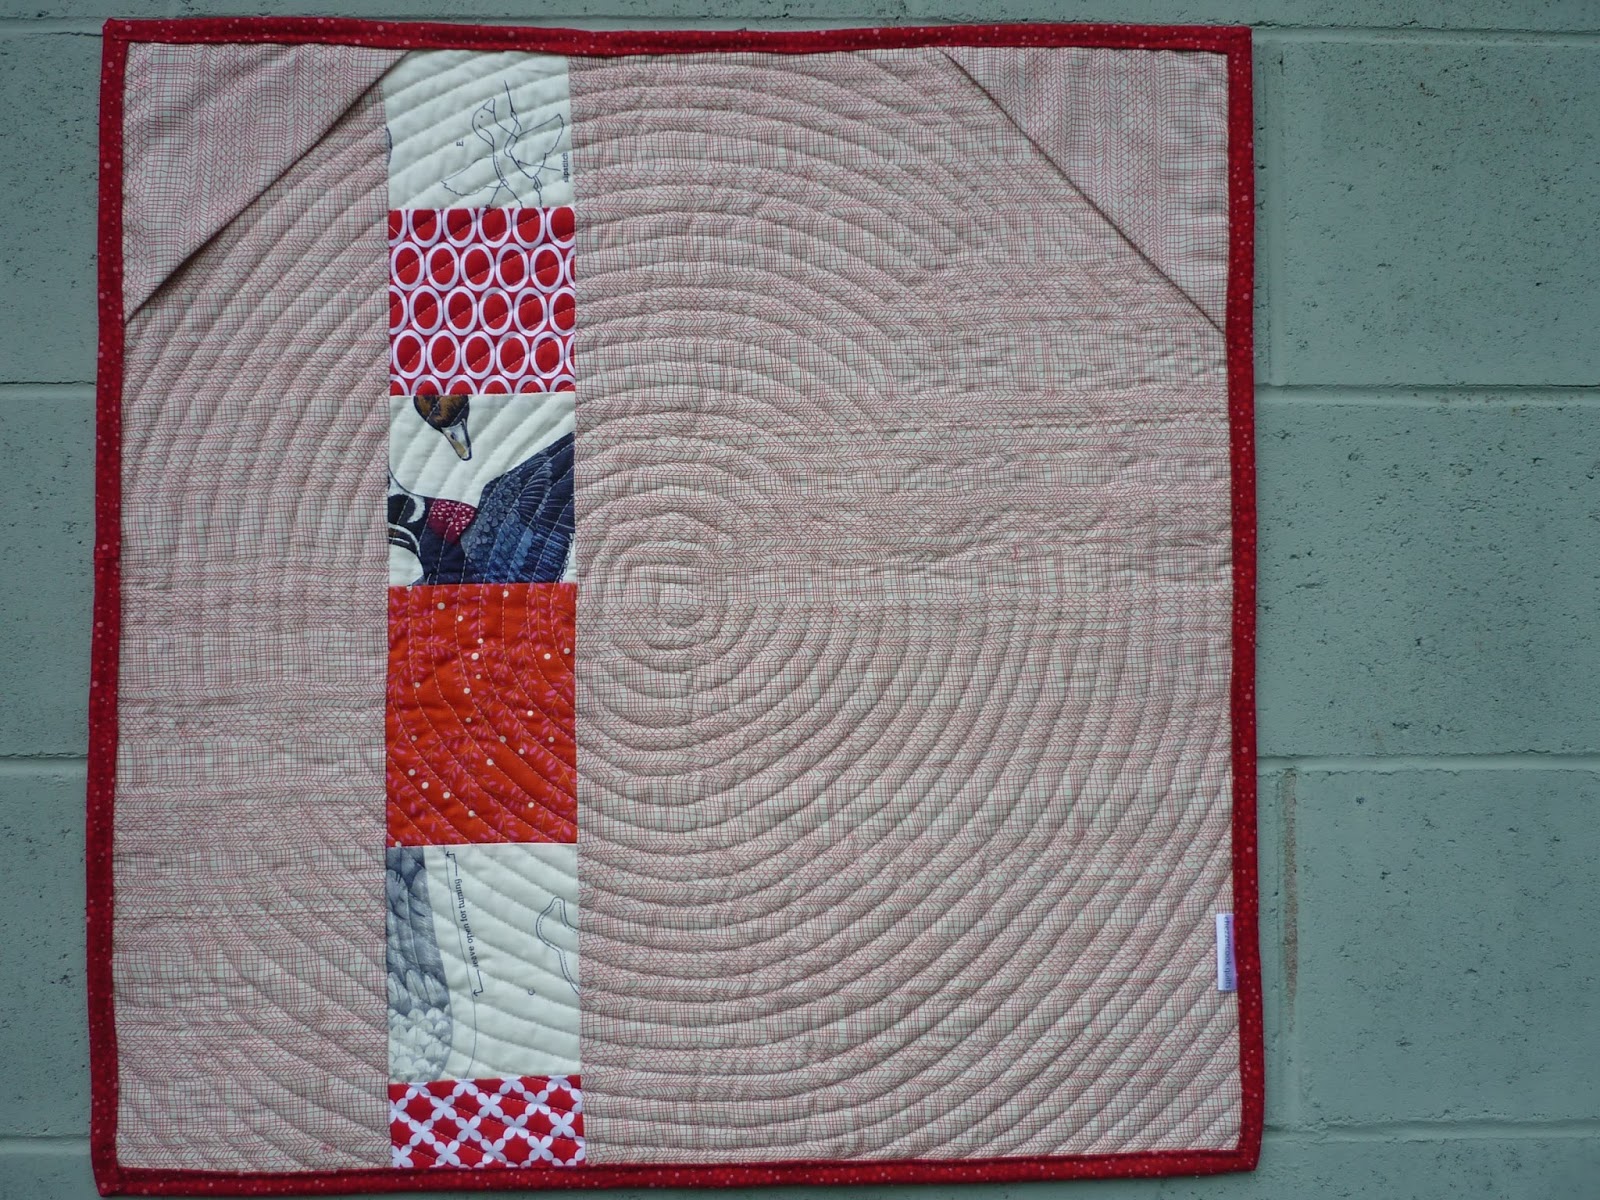
Don't you love the directions to make the ducks! On the back I stuck with the red theme, but I needed to also get a duck into the quilt somehow. So he got pieced in...love how you can really see the quilting from the back.


Well that's it. I feel like a can breathe now, my creation has been revealed! Feels good. Clearly I am an instant gratification kinda girl.


I am pumping my fist in the air and linking up with TGIFF!

Happy Friday!
Adrienne

Tuesday, 8 September 2015

WiP Wednesday: The one with everything

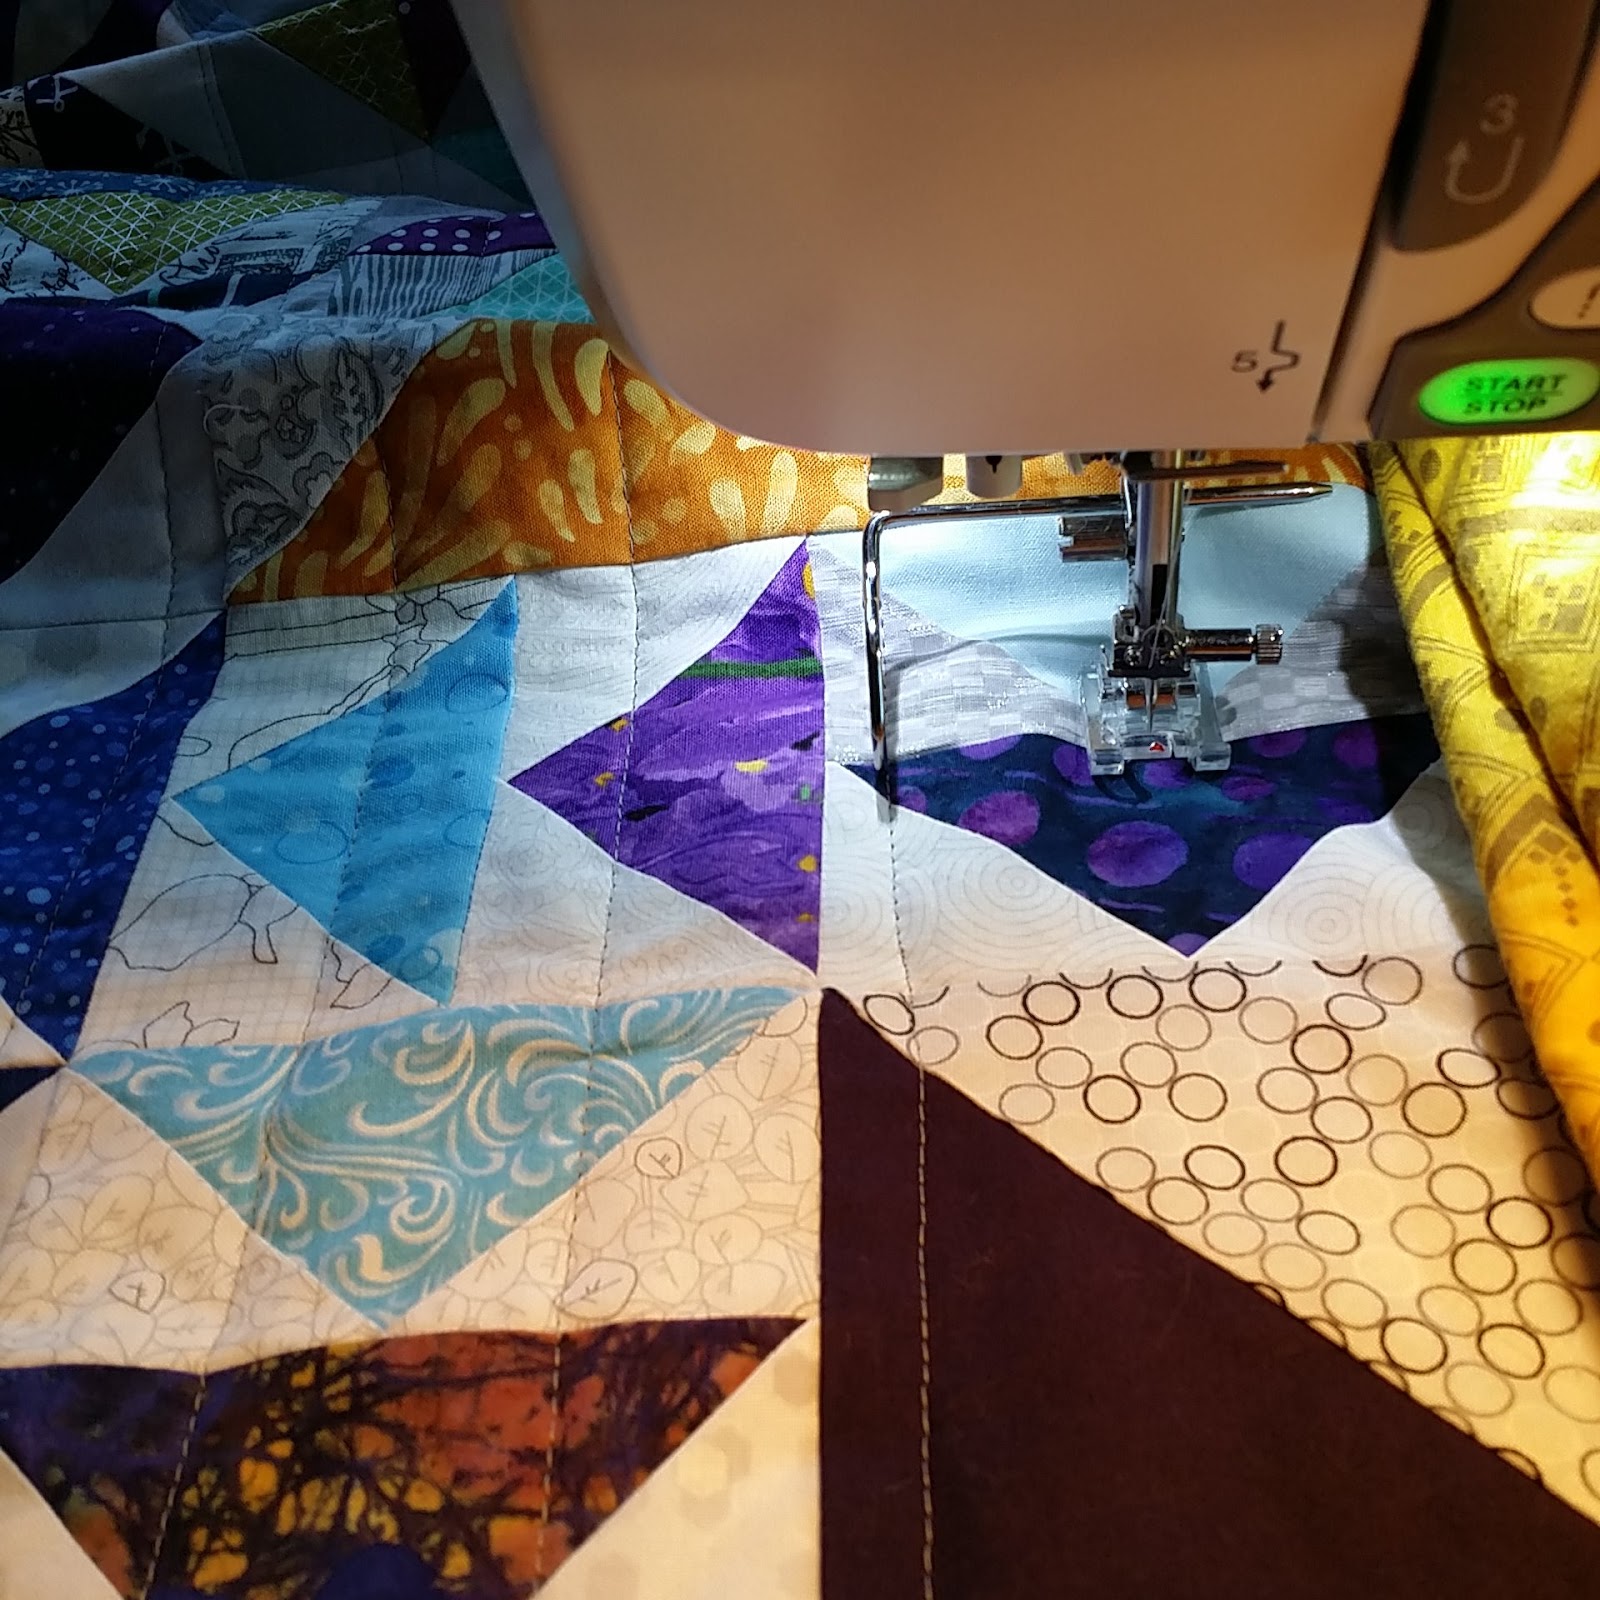
So yeah, it has been relatively quiet around here as of late. To be honest I have just not been feeling the bloggy vibe lately. I have been sewing though. I haven't been super productive but I have always had a a project (or five) on the go. Now I say on the go because I seem to have quite a pile of almost dones, and they have all reached the same point...quilting!

Today I was determined to put everything in front of me and make a plan. No more WiPs. Get this shit done! First to wrap up this baby! A mini quilt which will soon be released from the quilty protection program as it will be swapped at the Maritime Modern Quilt Guild Meeting on Thursday. I cannot wait for my swap partner to see this. I hope she likes it!


Then I have two more quilts basted and ready for quilting and binding


Oh and I started something new because I just wanted to. I have so many things I want to make, and the satisfaction of cutting stuff is getting the better of me.


And I have started quilting this special quilt which is also in the Protection Program but will be released any day now.  *** Update! Finished this one today!!! 


And then I have this top. Just a top, waiting for backing etc etc. I was so in love with the idea of this quilt using my sacred Jelly Role of Carolyn Friedlander Botanics. Long story short, it has turned out dull. I made a bad choice with Kona Silver as my background so the prints don't pop. Lesson leaned. But I have decided on a texture adventure plan to spruce this one up. So let's add that to the list.


*** Update! I dug into this one today. Pieced a back, basted and quilted! Stay tuned for the reveal. 


So yeah, that makes five major WiPs on the books (with more minor ditties hanging out in the wings, likely more on those later...)

I guess now that I have put them out there I need to work on them. Thank you for being the person sitting beside the couch while I get this all off my chest.

How many WiPs are lurking in your house? Don't be shy. No ones looking.
Adrienne

Thursday, 3 September 2015

TBT: The one with traingles

Happy Throw Back Thursday my quilty peeps! This month I am looking back at triangles. Ah triangles, how I love the.


According to my Quilt Book - yes that's right people, I had a hand written, glued pictures and fabric swatches handmade blog, in a three ring binder. Old School. Anyway - the books says this quilt was made in 2000. So it has been my bestie for 15 years.


On a daily basis my Thousand Pyramids lives here, in the living room, at the ready for couch snuggles. I did make a second triangle quilt a couple of years ago (Bliangles) which is not in this pic only because it is on the couch now ;)

I love the weight of blankets in bed and when I first started quilting I used the highest loft batting I could get my hands on. It cost the earth, was the ultimate B&^$! to quilt because it was so heavy, but it remains one of my top three quilts because it is cuddly perfection! This quilt has been my sleeping bag on every camping trip I have had in the last fifteen years.


I took my lovely out to the yard today for a few pics. Seems only right to give it the star treatment.


An old cast-iron sink may not seem like the star treatment, but I love this sink. Why is it in the sandbox in the yard? I don't ask questions about these things anymore...


Not a modern fabric in her, not one but TWO borders and the worst binding ever. But I still love it. 


Thanks for talking a walk down memory lane with me. I am linking up with Jenn over at A Quarter Inch From The Edge for her monthly series Throwback Thursday!

http://quarterinchfromtheedge.blogspot.ca/2015/09/throwback-thursday-volume-2.html

I'm on a sew-cation for the next few weeks,and I see a LOT of quilting in my future, so be prepared to be bored with posts!

See you soon
Adrienne

Sunday, 23 August 2015

Chain Piecing A Quilt Top: A Tutorial

I'm back! With a tutorial no less. I have had a couple of people ask me about my Top Chain Piecing method recently, and I started teaching it at my beginner quilting class at Patch Halifax, so I figured it is high time I do a tutorial up and share it here.

Now, let me start by saying that I can in no way claim this method of piecing a top as mine. I am fairly certain this is an Eleanor Burns (of Quilt In A Day fame) trick that I picked up over time and just never stopped using it. So all hail Ms. Burns! Chain piecing goddess!

This method works best on single block quilts e.g. all blocks are the same size, but really could be adopted to most quilt tops, just takes a little figuring. Without further ado...get ready for Pictures!

Chain Piecing Your Quilt Top

All seams in this tutorial are 1/4" unless otherwise noted. 

Step 1: Laying Out Your Top

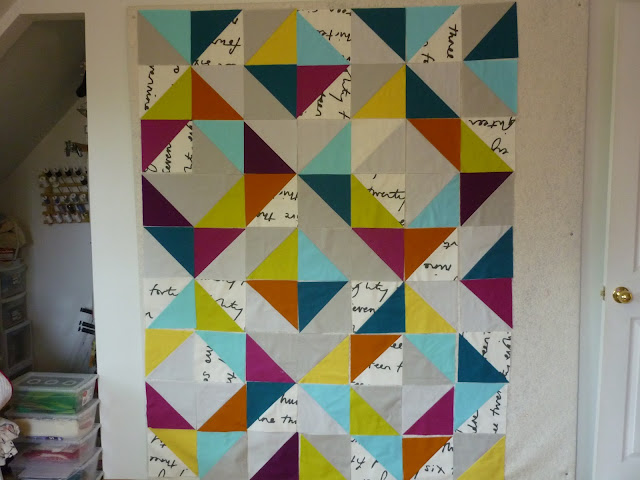
Being able to lay out your quilt top in full and leaving it in place during the entire piecing process is important. It will make your life a lot easier. Now piecing your top will be quicker with this method, but if you cannot sit down for a few hours and finish your top all in one setting, make sure you put your top in a place that that you can leave it laid out. Here, my HST quilt is up on the design wall.
 
Step 2: Mark Your Rows

With your preferred marking method - I like a post it note and a pen - mark your rows from the top left hand block. I have nine rows so marked one through nine. I like to pin the post it note in place as the blocks will get moved around a lot and at the beginning the row markers are important!


Step 3: Join Blocks One and Two in each Row

Now we start to join the blocks to create the rows. Take the blocks in the second column and fold them over the blocks in the first column, right sides together. Basically you are setting up the first two blocks of each row to sew them together


Once you have the second column blocks on top of the first column blocks, start picking them up with number one on top, number two behind one, number three behind two and so on.

side note - I tried to video tape myself doing this step, because it is a very visual step, but recording things on your own is a hoot! What the heck, for your viewing pleasure...


Again, here we are picking the blocks off the wall to take to the sewing machine. picking them up with number one on top, number two behind one, number three behind two and so on.

 
Take the pile of blocks to the sewing machine and start sewing! 


Here the full pile of block one and block two


This is the first two blocks, they will already be right sides together from the wall, but just wanted to show you how they go other. Once your have the blocks lined up, lining up any seams that your pattern calls for, sew the blocks together.

Once you reach the bottom, line the second rows first two blocks up and keep sewing, not breaking the thread chain until all blocks are sewn together


 You will end up with a string of block bunting


Step 4: Adding block three (etc.) to the first two

Now that you have two columns sewn together and your rows started, leave it at the sewing machine and head back to the top. Go to the third column of blocks and pick them off the wall. Again, start picking them up with number one on top, number two behind one, number three behind two and so on. Take that pile to the sewing machine

At the machine - open block one and two and lay block three, right sides together, with block two lining up any seams and start sewing. 

Keep adding the third blocks to the row, again not breaking the thread chain. Do not cut anything apart!


Here is the top with four blocks sewn together.


Keep moving to the right until all of the rows are complete.You will end up with a top that looks like this


Step 5: Preparing To Sew your Rows Together

Now you have all of your blocks sewn into rows. It is time to sew those rows together.To get ready for this step I head to the ironing board first. From the wrong side I start at Row one and iron my seams in alternate directions e.g. row one seams are ironed to the left, row two to the right, right three to the left etc. This will make nesting your seams easier and more accurate. 


Step 6: Joining the rows together

Now, lets get those rows together. Starting at row one, fold row one down to row two with right sides together. Nest seams where the blocks join and pin the whole row


Sew row and row two together.


After you are finished sewing, take to the ironing board and iron open. I like to iron as I go, but you can save it all to the end if you would like. 

Next step would be to fold row two down on row three, nest seams and sew. Continue sewing all rows together in this method.

Step 7: Celebrate your finished Top!

Once all of your rows are done,  so are you! You will have a completed quilt top! 


I really love this method of piecing a top. I have never measured the exact time it takes to piece this way vs a block by block method, but this feels faster, so I go with it. 

A note about this quilt top: Our awesome Maritime Modern Quilt Guild has undertaken a charity quilting project to make Quilts for The Lodge That Gives. We have been collecting HST blocks all year and have collected enough to make Eight Quilts! We are getting ready to finish the quilts at our September and October Sew Ins. This top will be part of my contribution, and I am loving how it turned out so much that I think I will enter it into MMQG's Second Annual Quilt Show at the Amherst Fiber Arts Festival. So you will be seeing more of this baby as it gets quilted up! 

Thanks for dropping in. I hope you find this tutorial useful. Are there other tutorials you would like to see from me or just ones you have always wanted? Maybe I can make the magic happen!
Adrienne

Friday, 7 August 2015

Throwback Thursday (on a Friday)

Jennifer over at A Quarter Inch from the Edge has started a new Link Party called Throwback Thursday - looking back at those oldy but goody quilts.


Last summer I posted about my very first quilt. So I think I will start there again, and keep going. It will be fun to see if I can get pictures of some of my first quilts, as they are spread far and wide. A new challenge.

So, here is my very first quilt.... in all it's sashed glory!


I really don't know when the quilting bug bit me, it was just something always there. My mom and sisters are all sewers, but no quilters (that I know of) are in my family. I just wanted to make one. So I took myself to a class and the rest as they say is history. This quilt is the result of that class and perhaps is why I still have a love for HSTs!


The label on the back tells me that I was a tender 21 year old when I stitched this baby, and we have been using it ever since. It has been on every camping trip I can remember and has been a staple at our family camp forever!

It has some lovely wear happening now. I think it just adds to it's charm...


Yup - that is polyester batting in there...yikes! But you know what, that thing is light, warm and fluffy all at the same time, so I should not be ashamed:) The other funny fact about this quilt, the teacher never mentioned a thing called a rotary cutter. Every pieces was either "ripped' or cut with scissors. Not that this is a bad thing, but man am I glad I found Olfa!


This was Charlie's very first trip to camp and somehow he ended up on this quilt after an exhausting trip to the beach. This quilt seems to welcome everyone!

It's fun to look back at what we have made. For me, my choices and tastes have evolved over time. While I know that the colors in this quilt are likely never something I would chose again, I think I would still make the stars, but perhaps no sashing. Would that make this quilt Modern? Who knows. All I know is that I liked it then, that's why I made it, and I continue to create that way  now. If I like it, I make it!


Do you ever look back at your first quilt? Think about how you got there and where you are now? I would love to hear about it!

So now I am headed to link my first baby up with Jenn's Party!

Happy Throwback Thursday! (on a Friday)
Adrienne

Thursday, 16 July 2015

A Destash Treasure and A Challenge

So just last night I wrote about destashing and my eveing at the MMQG Desatsh Yardsale. Not soon after the post hit the web-waves my guild mates reminded me that I forgot one other piece of fabric that I took home that night...the ducks


Yes my friends, that is a duck fabric panel. We had a lot (like pee your pants alot) of laughs over this little gem. But I think I felt the ducks were being dissed, they needed some love. So I vowed to take it it, give it a home and turn it into something.... Mock me if you will but it will be amazing. Well it will be something...

So this post is for my guild mates - especially Dominuqe The Running Thimble, whose house this came from!
Can't you just wait to see what it will become?

Adrienne

Wednesday, 15 July 2015

To Stash or Destash? That is the question

Last week my sweet guild, Maritime Modern Quilt Guild, had a fun summer meeting. We had a Destash Yard Sale. The premise...you destash your stash, bring said destashed items to the meeting, put a bowl of loonies out for change and other guild members shop! Some of us made a few bucks and some of us spent a few (or many!).

My Yard sale Table

Based on the questions and comments floating around amongst my guild buddies leading up to the sale it became clear to me that not only are we fond of our stashes, we REALLY do not want to give them up! Oh the precious fabric...

When I started to think about destashing I got kind of excited! I mean, I don't LOVE every single piece of fabric in my stash do I?  And let's face it, I could likely sew out of my stash for a couple of years without buying anything. So I could afford to lose a few things right?!

I was brutal! You see, my stash now filled (and by filled I mean tops did not fit) twenty-four boxes and a my scrap drawer was busting - in fact I could no longer close the drawer and it had become a cat bed on many an occasion.

Not being able to close my scrap drawer did not concern Penny at all

So when I left for the sale my scrap drawer was reduced to this and I had four empty fabric boxes. I felt lighter, I felt accomplished, I felt friggin fabulous!


And I didn't buy anything at the sale either. Now that I had gone through my stash I felt like I didn't really need or want - that's right people I said "I did not want" any more fabric right at that moment. In fact the only thing I came home from the sale with was this


Empty boxes, a couple of left over books and one piece of fabric that no one wanted and it turned out I still loved and could not part with. Now I did not sell every bit, but what didn't sell I already knew that I would be giving to a quilty friend who is trying to build her own stash.

But I could tell by the anxiety ridden social media comments that not everyone feels the same about a good clean out. That for many folks the fabric is our family, no matter what. It must stay with us, we must love it and stitch it, or maybe just pet it.

Now let's be real... I still have TWENTY boxes of fabric. So I am by no means judging those who do not want to let things go, but what is it about fabric that keeps us so connected to it? Is it the color, the design, the silky feel of the cotton? Does each piece evoke some memory? Maybe it is combination of all of that.


I'm not sure of the answer to all of these question, but I would love to hear your thoughts on the matter. Do you hold tight to you fabric babies, do you only buy what you need and keep your stash small, or do you like a good destash?

And if your answer is - I keep it all and will likely be featured on a fabric inspired  episode of  "Hoarding Buried Alive"...would that be such a bad way to go?

Thanks for dropping by and reading my ramble.
Adrienne