Tuesday 29 December 2015

Playing with words

I like words. As long as I can remember I have collected words. In school it was a diary with quotes and things I liked. Later, cuttings from magazines pasted in a "scrapbook", then Pinterest and a "Words" board. I am not such a great putter togetherer of words, but I like them and I have always wanted to do a quilt with words. I have had a million, well maybe ten or so, ideas over the years for word quilts, but they have never really materialized. Until now.


Fast forward to a couple of months ago when I was invited to participate in a Travelling Quilt quilt bee. How it works, you come up with a quilt idea, start it, then send it off to your bee mates. Each month we get a quilt to add to from each member in our group. At the end of the year the last person with the quilt quilts and binds it and then we each get back a finished quilt! I am stoked about this whole business. A little nervous about my skill level, as checking out my fellow bee mates, theses are some seriously skilled Canadian quilters. But I think I can keep up and it's all about the challenge for me this year.


We have had some amazing snow days this week, and I am on vacation (yahoo!) so into the studio I went a couple of days ago and started thinking about what kind of quilt I wanted my bee mates to contribute to. Words!!! I am going to start off with a phrase that inspires me, and then I will ask all to add to the quilt. They can add a word, a phrase, whatever they want! I think it will be cool to see what comes back, and the thing will have travelled the whole country!

 
I started with the phrase "Go Somewhere New". Simple, but powerful for me. I love going new places, exploring new things. And I need to get off my bum and do more of this. Also, I think it's kind of fun that my quilt will be going somewhere new each month. Lucky devil.


Once I had the phrase, I knew I wanted to paper piece my letters. Now my friend over at Purple Boots and Pigtails, who taught me improv letters this year,  will be appalled that I went to paper piecing. But I have not mastered the art of normal sized improv letters, they are all gigantic when I am done. I used Elizabeth Hartman's Fridge Magnet pattern (which I would give you a link too, but I no longer see this pattern in her shop). This pattern is meant for her special freezer paper template technique, but frankly, that looked like way too much work, so I just modified the pattern by tracing the letters in the reverse so that I could paper piece.


Given that this quilt will be ALL MINE in the end, I used some of my favorite new fabrics. Alison Glass's Abacus and some AMH Luminous. The luminous may not have been the easiest thing to Paper piece with, but it does give my letters a little bit of texture and some sparkle! Everyone needs sparkle.


Once the words were done I also wanted to add another shape to this starter block. I went with flying geese because I loooovveeesss them. I started making them using this method, but quickly had a hot mess on my hands. No points, weird sizes etc. I was rushing I think, excited to get it all together.


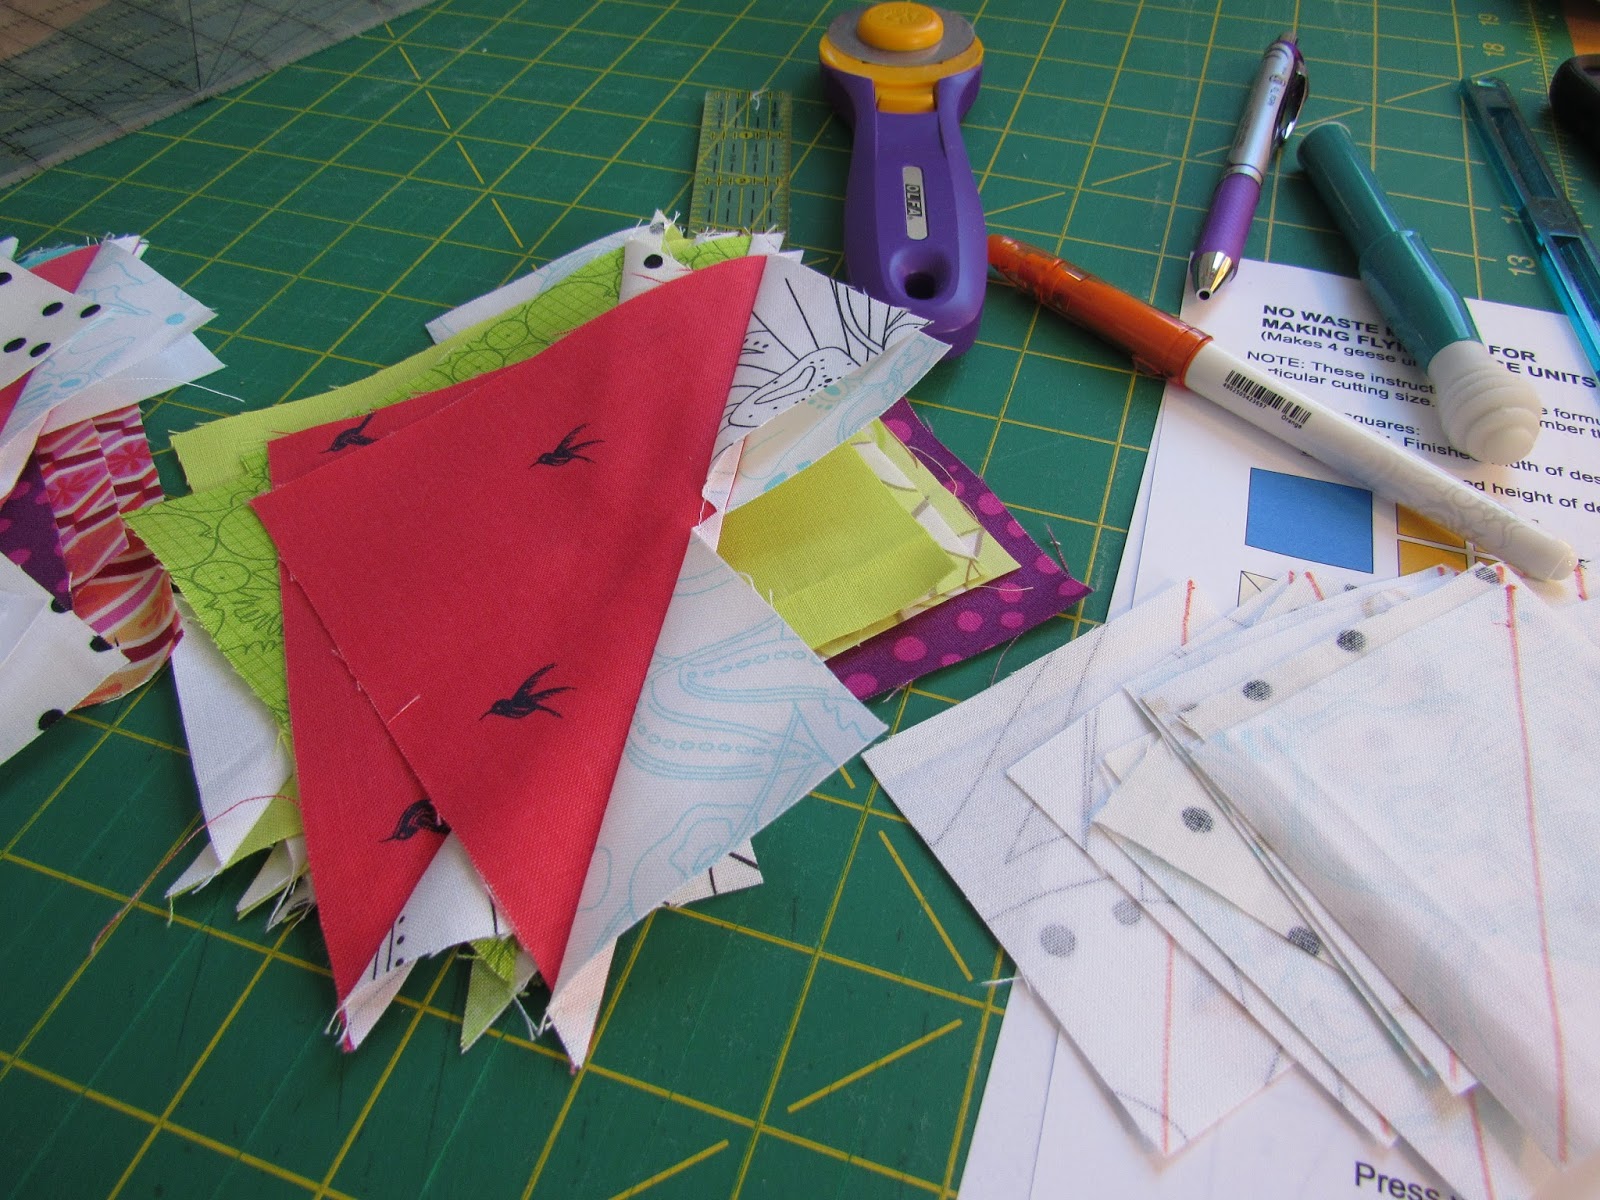
So I went back to paper piecing for the geese as well. Much better. The Points don't lie.


In the end I have a starter block that is likely way too big (28 x 15), and I don't expect my bee mates to make something so large, but I LOVE it. And I feel like I designed it all by my lonesome, so I love it even more.


As I am writing I realize that I will not see this wee bit of work back for a whole year! Weird and exciting. Cannot wait to see what the other chicks will add...


Have you taken on a new quilt along or bee, or something equally fun for 2016? I took a total break from all organized things in 2015 and it was good. But I need something to keep me focused and this bee will be fun me thinks.

Happy New Year!
Adrienne

ps. if you would like to follow snippets of our traveling quilts and happen to frequent Instagram you can find us at #travelingquiltscanada

Monday 14 December 2015

A Patch of Geese: A Finish

Where did a month go? It went to hectic places people. But who wants to hear about that? Not me, let's talk quilting!


This quilt started nearly a year ago (and was finished and photographed a month ago I might add - hence the leaves still on the tree, they are gone now!)...I wanted to find a way to thank the owner, Chris, of Patch Halifax for her support of my wee Guild, the MMQG. Since opening just over a year ago, Chris has generously allowed us to meet at her shop for our monthly meetings. This has meant the world to us.


So of course, making a quilt for Chris was an obvious answer! I threw out the idea to the Guild and I quickly had eleven of my quilty peeps volunteer to make flying geese blocks. We used the Migration Block Tutorial.


Once I had all the blocks in hand, picking out a layout was a bit of a challenge. I wanted something simple, but those blocks are pretty busy! So I decided to make a "Patch" of geese in some negative space. Simple straight line quilting with some coordinating thread gave the whole thing a little something something.


Some of the blocks were not quite big enough for the main patch, but I did not want to leave anything out, so I chopped those babies up and made a pieced strip for the back.


When we gave the quilt to Chris at our November meeting she was so pleased. Chris recently had a new baby boy and with another little one already at home, getting a gift just for her was a nice treat!


We all know that the process of making a quilt makes us feel good, I mean why else would be cut up fabric and put it back together again? But making this quilt, with my Guild mates, felt extra special. I love giving things that I know will be loved in return.

Speaking of love - I have to share this last picture. My Husband was helping me take pictures on a very windy fall day and when I was going through the pictures...I found this...my favorite. The PJs and rubber boots...that's my man!


My wee Guild is not so wee anymore and we have outgrown Chris's Shop, not a bad problem to have, but I will really miss meeting in such a creative atmosphere and surrounded by all of that fabric! That we have to move makes me even more happy that we were able to gift Chris this flimsy to remember us by! Mind you I am sure none of us will be strangers to Patch...did I mention the fabric?

Well I better get back to the Christmas sewing. Its a race!
Ho Ho Ho
Adrienne

Friday 13 November 2015

QAYG Stocking: A Tutorial

Now I need to start this post by saying that none of this QAYG Stocking business is my original idea. I first saw this over at Imagine Gnats and am even using her stocking template in this tutorial. So please do check her tutorial out. One thing I wanted to add to mine was a bit more detail about doing the stocking lining and all of that. It always confuses me. So I hope you will not be confused when we are done!

Also an apology in advance for the dark pictures. The season of the dark lord has arrived and sewing in daylight is very limited! 


So here is what you need:
  • exterior fabrics: 1/2 yard plus 2 FQ (or scraps) - Cut one back panel, and save the rest to piece the front panel.
  • lining fabric: 1/2 yard - cut two stocking panels (front and back)
  • batting: one piece 15×20″ (two if you want to quilt that back panel)
  • ribbon for hanging loop: one piece, 6″ long
  • Go to Imagine Gnats for her free pattern printable PDF 

First let’s make the QAYG Panel for the front of the stocking (you could make one for the back too!). From your Fat Quarters cut strips of fabric in random widths – you can totally get creative here. I kept my strips between 1 ½ and 3 inches.  

At this point I like to lie out my strips on the batting to get a sense of the layout. 

Take your piece of batting and starting in the middle, quilt one fabric strip, right side up, to the piece of batting. No need to worry about having any backing on this panel (quilt sandwich) since the stocking will be lined in a later step.  


Once you have your first strip quilted down you can add your next strip. Align its edges with the first strip, right sides together. Make a quarter inch seam, and then flip the new piece over. 


No need to iron, just finger press down and quilt that strip. Continue adding strips to the piece of bathing. You will end up with a quilted panel like this


Using your stocking pattern cut out the panel and you now have the front of your stocking. Make two if you want quilting on front and back. 


At this point you also want to add your ribbon so that you can hang your stockings later. Sandwich your ribbon between the front and back before you sew them together.  


With right sides together sew the front and back stocking pieces together leaving the top edge open. Trim your seam making sure to clip into the seam allowance along the inside curves so it will lie well when turned. 


Turn right side out and press flat. 


With right sides together sew the 2 lining pieces together leaving the top edge open and a 3″ gap along the bottom straight edge. 


Slide the stocking lining over everything with right sides together and sew around the entire top edge.


Turn the stocking right side out through the gap you left in the lining and give the whole thing a press again.


Before you tuck the lining down into the sock, you need to close the gap in the bottom. Tuck the raw edges of the lining inside and sew the gap shut. I used my machine to top stitch it closed. 


Tuck the lining inside the stocking and press flat, then again top stitch all around the top. 


Et Voila! A QAYG Stocking! 


So while I was making this tutorial I was actually making four stockings at one time (custom order!) so I probably should not do that next time as backing fabrics etc changed in the pics - anyone else notice that ? :)

Anywho, they turned out quite nice and I hope you found this tutorial helpful. Any feedback? Please let me know, I love it!


Since this was a big finish for me I am linking up with TGIFF! at Quilt Matters, Finish it up Friday @ Crazy Mom Quilts and Whoomp! There it is @ A Quilted Passion!

See you soon
Adrienne  

Wednesday 11 November 2015

WiP Wednesday: the one with curves

I haven't done a WiP Wednesday in a wile but based on this little tower, looks like I might just have a few projects on the go! Ha! (tower on left - WiPs, tower on right - stash all destined to be more WiPs)


So last Saturday my wicked good Guild, MMQG hosted one of our Skill builder workshops on sewing with curves. I have done a couple of curves before, but my friends it involved approximately 300 pins per block. An experience I was not ready to repeat! (I love you drunkards path, but not that much!)


In comes Heather, the MMQG PEI Lead, and her sharp Quick Curve Ruler skills!  Heather has had lots of experience using the Quick Curve Ruler. I must say I was pretty intimidated going in, but once she demystified it all for us, so easy! And the there are no pins to be seen! It's all about the gentle curve and slow stitching on the machine.


Here is my fabric pull for the class. We were all asked to bring our own Quick Curve Ruler pattern to work on. I went with Metro Twist and finally dove into my hoard of Jungle Ave by Sara Lawson and some Kona Watermelon. I LOVE this color.


It was so fun throughout the day to watch everyone's blocks go up on the design wall, so many pattern and fabric choices!


Now, once I got down to it (and actually read the pattern) I soon discovered that I have 160 curved pieces to make! 160 People! Needless to say, once I got the skill down, I spent the rest of the afternoon of the workshop getting all of the fabric cut for the rest of the quilt top, and then once I got home I set up the sewing machine again (at the kitchen table) and got to work.


Approximately four beers later, it was Saturday night folks, I had 80 pieced. Not a bad patch of work. Right now I am here...


Half of the pieced blocks done and pressed, they need squaring up and then repeat with the next 80.


Now, since the Christmas Season is upon us and I am, as always, last minute sewing, these curvy babies are going into the WiP tower, but I know I will be back to them as soon as I can. Cannot wait to see how it all comes together. And for sure I am thinking about my next curvy project.

I have to shout out to Heather for the excellent workshop, and thank you MMQG for the best ten bucks I ever spent on a Saturday! 


I am linking up with Lee at Freshly Pieced, The Needle & Thread Network and with Lorna at Sew Fresh Quilts for Let's Bee Social! What are you working on this week?
Adrienne