Hi! After five years I am moving my blog to a new platform! You can now find me at Seam Work.
Don't be a stranger!

Saturday, 17 February 2018
Tuesday, 26 September 2017
On Point
Do you watch The Midnight Quilt Show with Angela Walters? I do! I love seeing how things are made in "real life" and I like that she drinks wine and eats chocolate while she does it. I may do that too, just saying.

On one episode she showed the On Point Quilt (you can download the pattern for free HERE). I really liked that this quilt looks like complicated triangles but it has a really neat processes that turns long tubes into triangles. I love time saving tricks. The other nice thing about this pattern is that it is Jelly Roll friendly. I happened to win a Jelly Roll recently so I was in!

I started making the quilt (with my sparkly new Jelly Roll) and realized it would be a great beginner quilt if we made it just a bit smaller into a baby size. So with some amazing Dear Stella fabric from Patch Halifax, I made this sample and am now teaching it to some budding quilters at Patch.

I do plan to go back to my Jelly Roll version, and will make it to the original pattern size (66 x 71). So stay tuned for that finish. I am using it as as sample at class so hope to have finished with my students!

You should totally check out this pattern if you want to learn a new trick for triangles.

Annnnnnd....believe it or not, I am now caught up on telling you about my quilty business from the last few months! Phew!
Of course I always have one or ten projects on the go, so don't go too far. I am sure there will be more of me here soon. Now that summer is winding down the itch to sew is even greater!
Adrienne
Wednesday, 20 September 2017
VAST
Yes, the quilt I am about to show you is VAST - in size that is. Coming in at 110" x 115" this is for sure the biggest quilt that I have made.

The inspiration for this quilt was the fabric. I wanted to make a King Sized quilt (for my naked bed) that would be a showcase for some of my very favorite fabric. The cull continues. Leah Duncan Morning Walk made it finally to the cutting table. Mmmmm Art Gallery.

HSTs are one of my very favorite quilting blocks. In Jeni Bakers book The Half-Square Triangle she has a pattern for a Vast Quilt, which is basically large HSTs. Perfect! I cut my HSTs as large as my yardage would allow and I was off!
Because this quilt was so large, I chose to once again apply a Quilt As You Go method to my quilting. I have had lots of questions about how I approach QAYG so I documented my steps along the way....
My QAYG Process
Once I had my HST blocks made I determined that a manageable "chunk" for quilting was three rows. My quilt had nine rows in total, so that easily broke down into three QAYG sections.
Once I had the three sections pieced, I cut batting for each section, with the batting extending 1-2 inches beyond the top on all sides.

Now one of the benefits (to me anyway) of QAYG is the minimal amount you need to baste. Once I had those long sections layered with batting I wondered about the need to baste at all! Could I really get away with no basting? So I experimented with one section. Laying a batting and quilt top section on the table and taking my time smoothing things out and rolling the section into a tube for transportation to the sewing machine.
 It worked! There was minimal shifting that I could easily manage while I quilted.

I quilted straight lines, with my favorite mustard thread and ended up with sweet quilted sections.

Once all the sections were quilted, I trimmed away the excess batting and the joined them together using a 1/4 inch seam. I pressed these seams open to reduce any bulk.


Now I had a completely quilted top! Time to make a backing.
Now here is where you still need to baste! Baste using your preferred method - pins, spray basting etc.

I laid my top on my deck, right side down, gave it a good spray baste and applied my backing (sections at a time). My deck was just one foot too short to hold this whole beast. Note to build bigger deck next time!
Once your top and back are basted you do need to "tack" the back to the top. So basically you need to quilt it, but you just don't have so much to do. What I chose to do is at every third quilting line I added another one which quilted through all three layers. You really just need to use your judgement about how far apart you make your "tacking" quilt lines, but for this project, that spacing was enough to hold everything together well.

So I did have to get that big heavy thing through my machine, but only 10 or 15 times instead of 50! So I consider this a win!
Next step, trim your excess backing and bind!

I didn't have enough Leah Duncan for binding but this Heather Bailey True Colors number was perfect. You now have a giant quilt and your back and shoulders are hopefully saved a little!

You can see in this picture the two types of different quilting lines, QAYG and tacking. And below the tacking lines from the back.

ps I am so happy I had enough pieces and bits to make a backing from my stash!

Well there you have it. Another quilt using the fabrics I thought would disappear if I cut them up. The opposite happened, now I see them every day! Time to dig out those hoards and break out the scissors my quilty people!

Bye for now
Adrienne

The inspiration for this quilt was the fabric. I wanted to make a King Sized quilt (for my naked bed) that would be a showcase for some of my very favorite fabric. The cull continues. Leah Duncan Morning Walk made it finally to the cutting table. Mmmmm Art Gallery.

HSTs are one of my very favorite quilting blocks. In Jeni Bakers book The Half-Square Triangle she has a pattern for a Vast Quilt, which is basically large HSTs. Perfect! I cut my HSTs as large as my yardage would allow and I was off!
Because this quilt was so large, I chose to once again apply a Quilt As You Go method to my quilting. I have had lots of questions about how I approach QAYG so I documented my steps along the way....
My QAYG Process
Once I had my HST blocks made I determined that a manageable "chunk" for quilting was three rows. My quilt had nine rows in total, so that easily broke down into three QAYG sections.
Once I had the three sections pieced, I cut batting for each section, with the batting extending 1-2 inches beyond the top on all sides.

Now one of the benefits (to me anyway) of QAYG is the minimal amount you need to baste. Once I had those long sections layered with batting I wondered about the need to baste at all! Could I really get away with no basting? So I experimented with one section. Laying a batting and quilt top section on the table and taking my time smoothing things out and rolling the section into a tube for transportation to the sewing machine.


I quilted straight lines, with my favorite mustard thread and ended up with sweet quilted sections.

Once all the sections were quilted, I trimmed away the excess batting and the joined them together using a 1/4 inch seam. I pressed these seams open to reduce any bulk.


Now I had a completely quilted top! Time to make a backing.
Now here is where you still need to baste! Baste using your preferred method - pins, spray basting etc.

I laid my top on my deck, right side down, gave it a good spray baste and applied my backing (sections at a time). My deck was just one foot too short to hold this whole beast. Note to build bigger deck next time!
Once your top and back are basted you do need to "tack" the back to the top. So basically you need to quilt it, but you just don't have so much to do. What I chose to do is at every third quilting line I added another one which quilted through all three layers. You really just need to use your judgement about how far apart you make your "tacking" quilt lines, but for this project, that spacing was enough to hold everything together well.

So I did have to get that big heavy thing through my machine, but only 10 or 15 times instead of 50! So I consider this a win!
Next step, trim your excess backing and bind!

I didn't have enough Leah Duncan for binding but this Heather Bailey True Colors number was perfect. You now have a giant quilt and your back and shoulders are hopefully saved a little!

You can see in this picture the two types of different quilting lines, QAYG and tacking. And below the tacking lines from the back.

ps I am so happy I had enough pieces and bits to make a backing from my stash!

Well there you have it. Another quilt using the fabrics I thought would disappear if I cut them up. The opposite happened, now I see them every day! Time to dig out those hoards and break out the scissors my quilty people!

Bye for now
Adrienne
Thursday, 14 September 2017
Culling the Herd: a finished QAYG Quilt
Hi, my name is Adrienne and I hoard fabric. Not all fabric, but you know, the "special" stuff. That certain designer you love, or a favorite line that you bought (maybe several years ago) that you just can't bear to cut into. If you cut it, it's gone right?!

Well this year, in the continued effort to sew from my stash, I decided it was time to cull the herd, finally cut into those treasured piles. First up, my Anna Maria Horner stash... which I've been collecting for quite a while now.

I always had a plan for this collection, a Quilt As You Go Herringbone quilt from the Maureen Cracknell tutorial. If you are regular visitor here you know I love incorporating QAYG into my projects. Its just so much easier to quilt big items when you break them down into smaller sections.

So I started cutting into my AMH stash and planned to work on the quilt at the MMQG Retreat this April at White Point Beach Resort. I did not take any other projects, just this one, I was on a mission!

I was planning to make a king sized quilt to fit my very own bed! I got to about queen size at the retreat and then I ran out of fabric, I had lots of wee scraps left, but at this point I think I liked the quilt just the size it was (plus my guest room could use some quilt love too!).
 The other thing that deterred my from going any bigger was the wonkiness I ran into while making the quilt. I think part of the issue was I was trying to go too big at once. Those LONG columns of batting my not have been the straightest and the angles of my herring bones may have gotten a tad off track as I moved down the columns. So if you examine it too close it is a bit of a hot mess, but it's MY hot mess :)

 In the end I am still happy with this quilt. I am a bit sad that I did not get to King sized, because my bed at home is still naked, but it turns out that there is always another quilt to make.

So, while the guest room is now looking rather spiffy, my bed....still naked....
Come back next week to see how I fixed this problem and my treasured Leah Duncan collection get the cut!
Do you have a "special" stash you cannot bring yourself to use?
Adrienne

Well this year, in the continued effort to sew from my stash, I decided it was time to cull the herd, finally cut into those treasured piles. First up, my Anna Maria Horner stash... which I've been collecting for quite a while now.

I always had a plan for this collection, a Quilt As You Go Herringbone quilt from the Maureen Cracknell tutorial. If you are regular visitor here you know I love incorporating QAYG into my projects. Its just so much easier to quilt big items when you break them down into smaller sections.

So I started cutting into my AMH stash and planned to work on the quilt at the MMQG Retreat this April at White Point Beach Resort. I did not take any other projects, just this one, I was on a mission!
 |
| My quilty friend Linda under the rainbow at White Point. she really is a pot of gold! (corny alert! but so true) |

I was planning to make a king sized quilt to fit my very own bed! I got to about queen size at the retreat and then I ran out of fabric, I had lots of wee scraps left, but at this point I think I liked the quilt just the size it was (plus my guest room could use some quilt love too!).


 |
| annddd...you always need a wet dog to help with photos... clearly my hubby in the background was not much help! |
Come back next week to see how I fixed this problem and my treasured Leah Duncan collection get the cut!
Do you have a "special" stash you cannot bring yourself to use?
Adrienne
Tuesday, 5 September 2017
Kriss Kross
And now...Kriss Kross! I love this quilt. The stripes, the Kona Punch, the 40 Weight Pink quilting. All. Of. It.

Suzy Quilts is the mastermind behind this pattern. I have a lot of her patterns waiting in the wings to be made. They look complicated, but they are relativity easy to make. Genius!
The pattern photo used a pink print and stripes so I do feel like I used no creativity at all, but the reality is, I had these stripes sitting in my stash, and in the continued effort to actually use my stash they were just perfect for this project. And I currently have an obsession with pinky colors so chose Kona Punch to go with, which was also in my stash. Some Kona Black and Snow and I was all set!

Block construction took some time as this was a project I pulled out in between other things of more priority - you know the ones - the gifts and items that make moolah!

When I started basting, the love really set in. I have had questions about how I lined up all those stripes. I did notthing different, just cut and pieced as per pattern and it turned out like this!

I chose a heavier 40 weight Aurifil (sorry, the spool is gone and I did not take note of the color) to quilt with. I like how it stands out. I was thinking of doing FMQ on this baby, but frankly with all those stripes there was already a lot going on, so straight reliable lines it was.

More Punch on the binding, because you can never have too much...

And for the back I found this perfect tone on tone print at a store closing sale. Sad that the store closed, but some real steals on lots of meters for backing...


I made the lap size version of the pattern, but I could see this in something bigger as well. Someday...
Do you have a current color obsession? I am traditionally a blue/ green girl, but man I cannot get enough of the pinks these days.
I'll be back with more finishes! Stay tuned...
Adrienne
Wednesday, 30 August 2017
Summer 16 Quilt
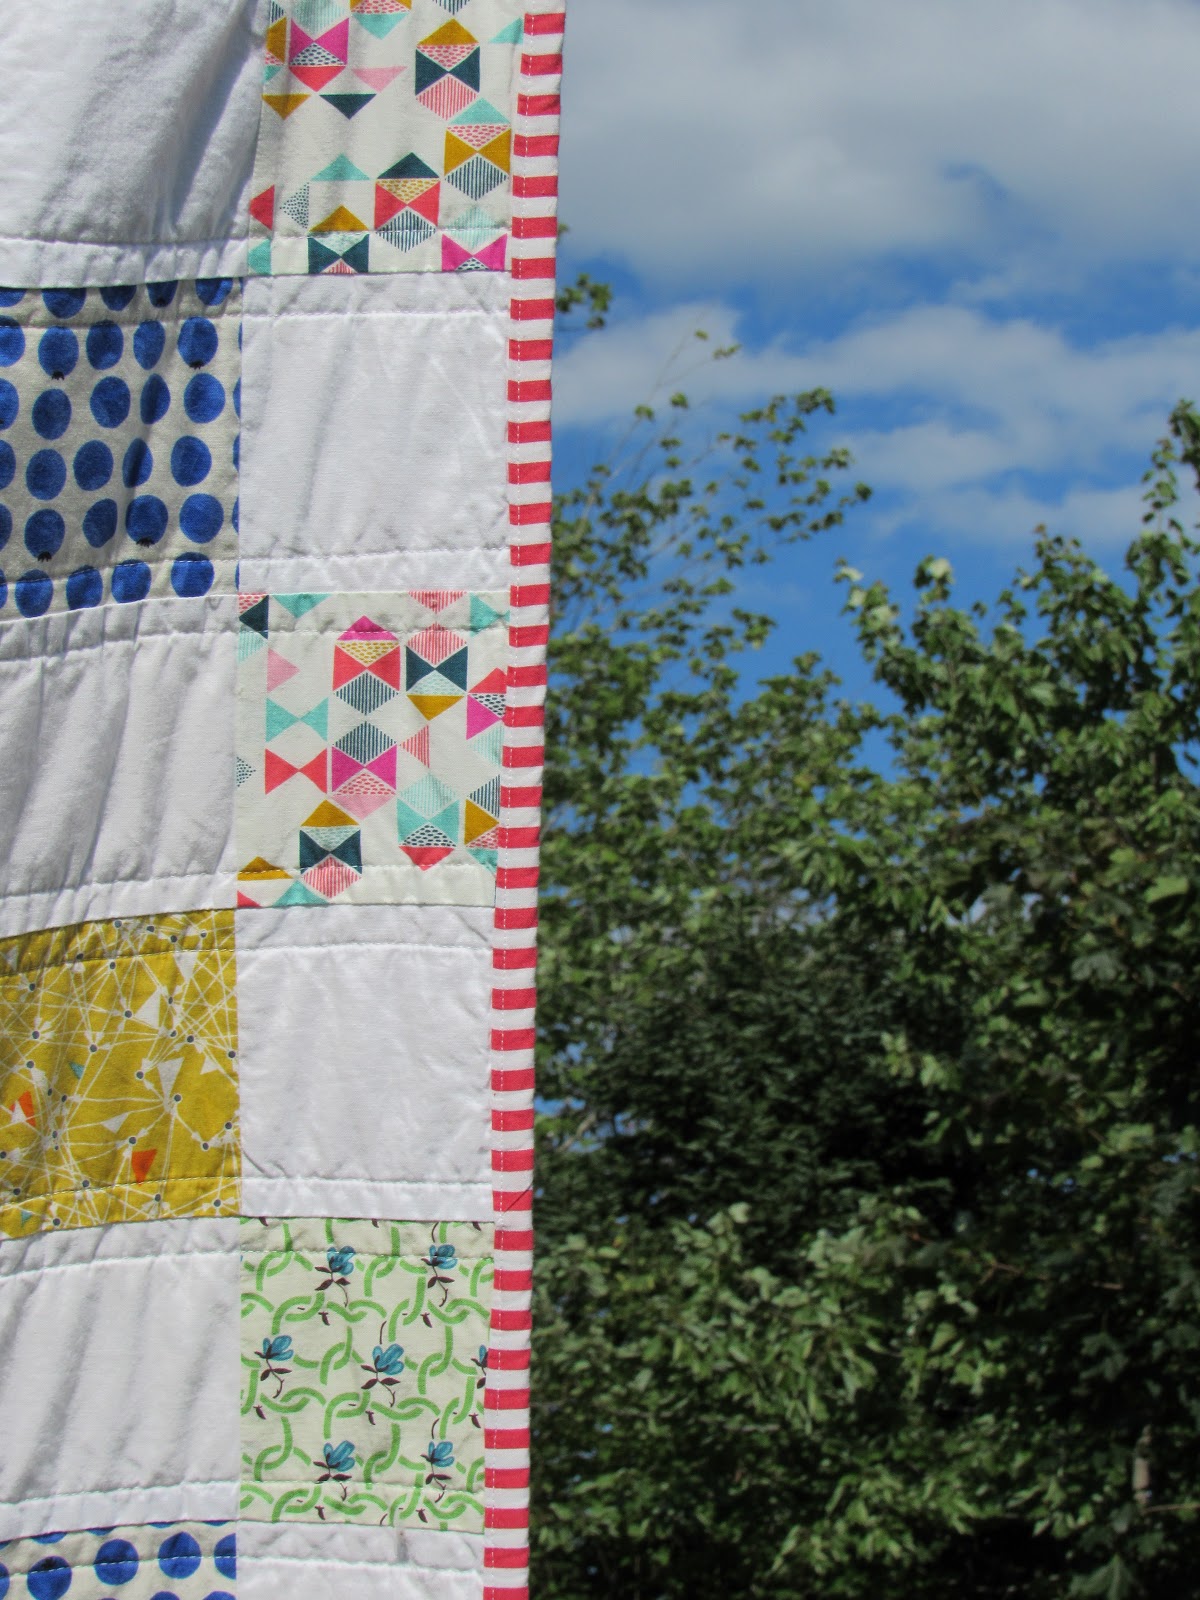
Welcome back! I want to share my Summer 16 quilt today. This quilt was a custom order that I worked on over the winter months. My friend wanted a bright summery quilt for her bed in a new condo and in time for summer! Her inspiration were the quilts made by Rita at Red Pepper Quilts. I don't blame her, I love all of Rita's work!

This quilt is full of "special" hoarded fabrics from my stash that make me smile. I mean look at that wee bicycle! Baguette and a glass of wine anyone?

I called it summer 16 because I had every intention of making 16 patches and building the quilt from there. It didn't quite go that way, but the name stuck! here are some "in the making" shots...
I really loved working on this quilt through the winter. On some of the coldest days we had I would pull out the white and brightly colored squares and work away, dreaming of summer days...


Do you have a favorite summer versus winter quilt? I switch mine out all the time!
Thanks for coming to visit, I'll have more to catch you up on soon!
Adrienne

This quilt is full of "special" hoarded fabrics from my stash that make me smile. I mean look at that wee bicycle! Baguette and a glass of wine anyone?

I called it summer 16 because I had every intention of making 16 patches and building the quilt from there. It didn't quite go that way, but the name stuck! here are some "in the making" shots...
 |
| Original fabric pull |
 |
| My helper. |
 |
| This ended up being a big queen like 90 x 90, it was fun quilting! (she says sarcastically) |
 |
| Decisions about binding and backing...We went pink! |


Do you have a favorite summer versus winter quilt? I switch mine out all the time!
Thanks for coming to visit, I'll have more to catch you up on soon!
Adrienne
Subscribe to:
Posts (Atom)